DIGITIZE PARCEL/TAX MAPS
If your parcel map is scanned as a 1-bit black and white image, you can go ahead and use Auto Vectorize to get all parcel boundaries vectorized automatically.
Use R2V's Line Editor to clean up the vector lines and update broken boundaries.
Use Vector/Create Polygon Layer function to close all polygons.

How To Vectorize A Parcel Map With A Lot of Text:
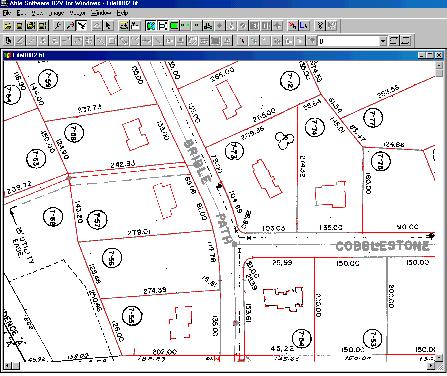
A parcel map normally includes parcel boundaries in the form
of closed polygons, text for parcel ID, and other lines. The following
are some steps you can take to maximize automatic processing and
minimize editing for digitizing parcel maps:
- Step 1. Assume the image is a 1-bit monochrome image. Check the resolution to make sure parcel boundary lines are connected. If not, you can use Image/Resize to downsample by 2 or more. You can also use Image/Despeckle a few times to remove noise.
- Step 2. Image/Conversion/Convert to Grayscale. Note: If you don't want to change the image to grayscale, you can skip Step 2 and at Step 3, define the color as the background color, and fill only lines you do not wish to vectorize. After the data is vectorized, you can save the vector lines and load the original image as the backdrop when doing editing.
- Step 3. Select Image/Image Pixel Tool On, then change to Fill Area mode. Define the color as 100, or something different from the background (255) or 0 (lines). Move the cursor to a parcel line and click the left mouse button to fill. You'll see all connected parcel lines will turn to the new color. Repeat this step to fill all parcels.
- Step 4. Select Image/Set Image Threshold to adjust the threshold to include only the parcel lines (color around 100) to red and confirm this.
- Step 5. Select Vector/Auto Vectorize to make sure the "Use Defined Image Thresholds" box is checked. Then start the process to vectorize only parcel boundaries.
- Step 6. Edit the lines to remove non-boundary lines and any text that's vectorized.
- Step 7. Use Vector/Create Polygon Layer to create polygons and use Edit/Line Editor/Form Polygon to close polygons if needed.
- Step 8. Assign IDs to parcels if needed and export the vector data.