Automatic Image Slice
Alignment
When object movement happens during the imaging process or images are taken at different times, image slices may not be aligned properly. This can affect the accuracy of image analysis. The Image/Auto Alignment command uses a maximum likelihood algorithm to align image slices accurately across a stack.
 Click here to watch a video
tutorial.
Click here to watch a video
tutorial.
Interactive Image Slice Alignment
When image slices (planes) are not properly aligned, you can use the image slice alignment tools get all slices properly aligned. The commands under the Image/Align Slices submenu allow you to move or rotate image slice around until it is aligned to the neighbor slice.
Click here to watch a video tutorial.
The image slice alignment should be done first before doing segmentation, 3D rendering or other processing.
The following steps explain how to use the Align Slices commands to align the slices of a multi-plane image:
Open the image stack using the File/Open command. You should see two windows, the image plane window and the montage window. If you have not created an image stack list, you can use the “New Stack” command to do so.
Select Image/Align Slices/Start Alignment to start the alignment tool. The current image slice is turned transparent and displayed on top of the previous slice. For example, if your current image plane is 55, then image plane 54 is displayed together with 55. Both are displayed transparent. The initial tool is “Move Slice”. Hold down the left mouse button and move the cursor within the image window to move the current image slice around until it is properly aligned with the previous slice.
To let the software align the current slice automatically, click the right mouse button to show the tool menu and select the “Auto Align” option. After the slice is aligned, you still use the “Move Slice” and “Rotate Slice” to adjust manually.
If you need to rotate the image slice, click the right mouse button to bring up the floating tool menu. Select the “Rotate Slice” tool. To rotate the slice, simply hold down the left mouse button and move within the image to rotate. Once the image slice is aligned, release the left mouse button to confirm.
Use the F5 and F6 function keys to move to the previous and next plane to continue the alignment process. Repeat Step 2 and 3 to align all image slices. Even though the slices appear to be aligned at this point, the alignment is for display only and the current image stack is not changed. You'll need to follow the next step to save the aligned image stack to a new file for further processing.
Once all slices are properly aligned, click the right mouse button to bring up the tool menu and select the “Save Aligned Image” command to save the results to a new image file. The Save As dialog box will appear and you can enter the file name that is going to be used to store the new aligned image. Click the “OK” button to start the alignment process. When the process is finished, use the File/Open command to open the aligned image file for display and processing. The current image stack is not changed during the process.
If there is a strong correlation between image slices, you can also use the Image/Auto Alignment command to perform an automatic alignment of the image slices.
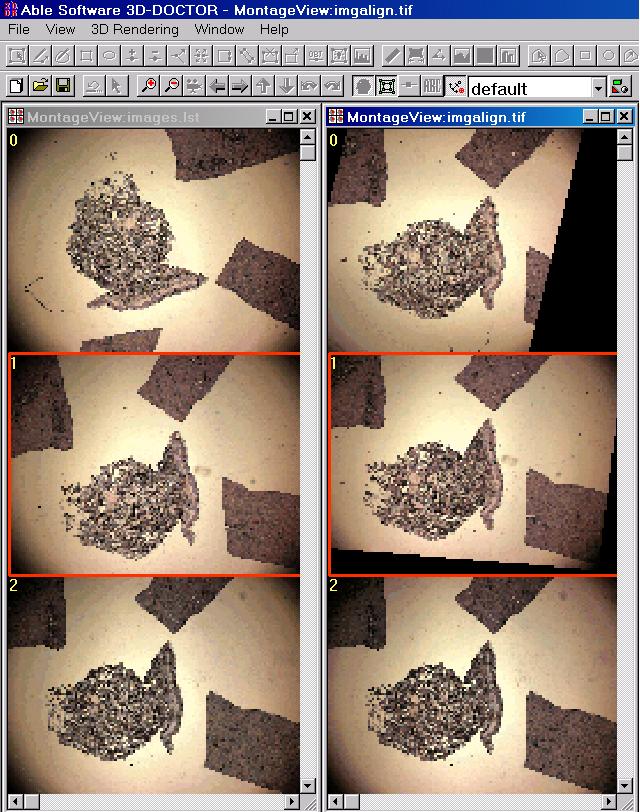
The screen image on the right shows the original image on the left and aligned image using the Alignment command: